Fresh Milled Sandwich Bread Recipe
This fresh milled flour bread recipe started because I wanted to try fresh milled bread in the most normal, approachable way possible:
One loaf, basic ingredients, and no complicated recipe math.
I have baked for years, but fresh milled flour is still pretty new to me. I had been easing into it with things like muffins and pancakes, and eventually I started feeling brave enough to try an actual loaf of bread!
The fresh milled flour book I was using had bread recipes that made several loaves at once, and I did not want to try to split a big bread recipe on my first go. Plus, the math was not mathing.
It also called for a type of yeast I did not have, so instead of trying to force that recipe to work, I took the basic structure of a simple bread recipe I already knew and adapted it for fresh milled flour.
And honestly, this loaf surprised me.
It was by no means a perfect, polished process.
My water was warmer than it should have been. I added the oil at the wrong time. The dough kept climbing out of the bowl while kneading. I waited for a beautiful windowpane that never happened. I ended up overworking the dough and my KitchenAid. She survived, thank goodness!
I almost gave up. I was sure there was no way this was going to turn out.
But then it baked up into bread.
Good bread, too.
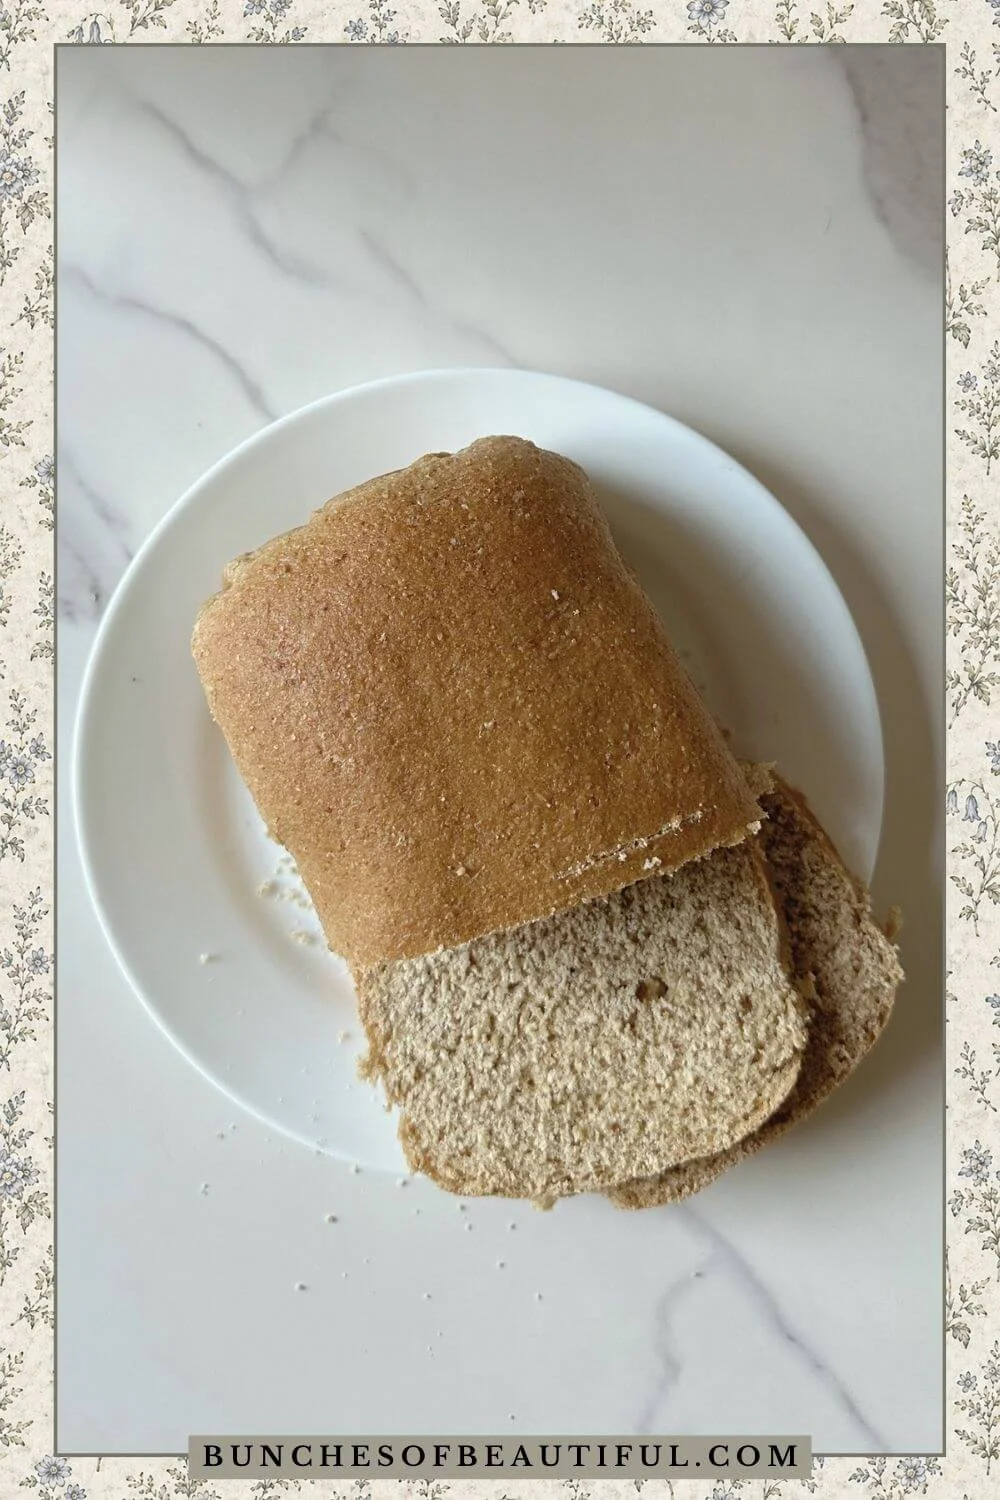
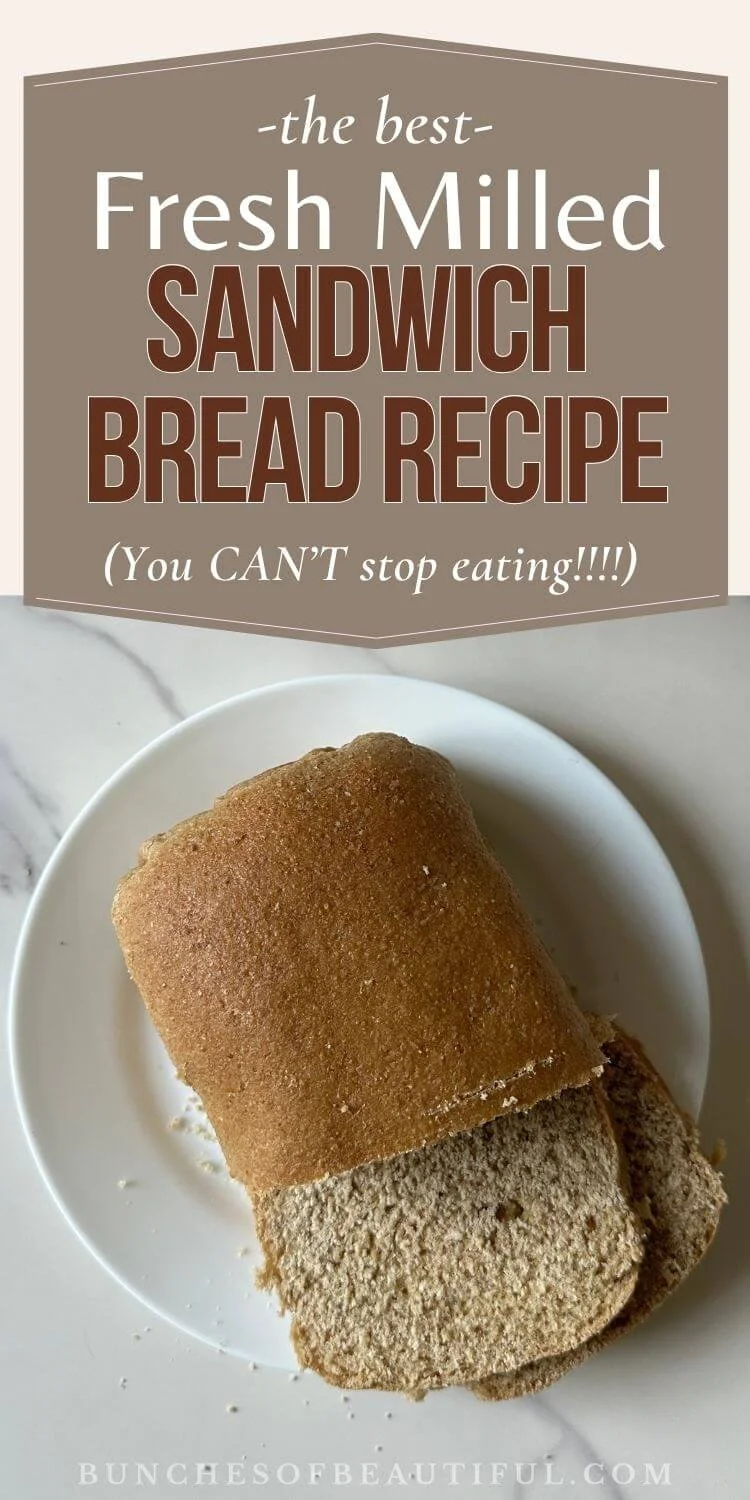
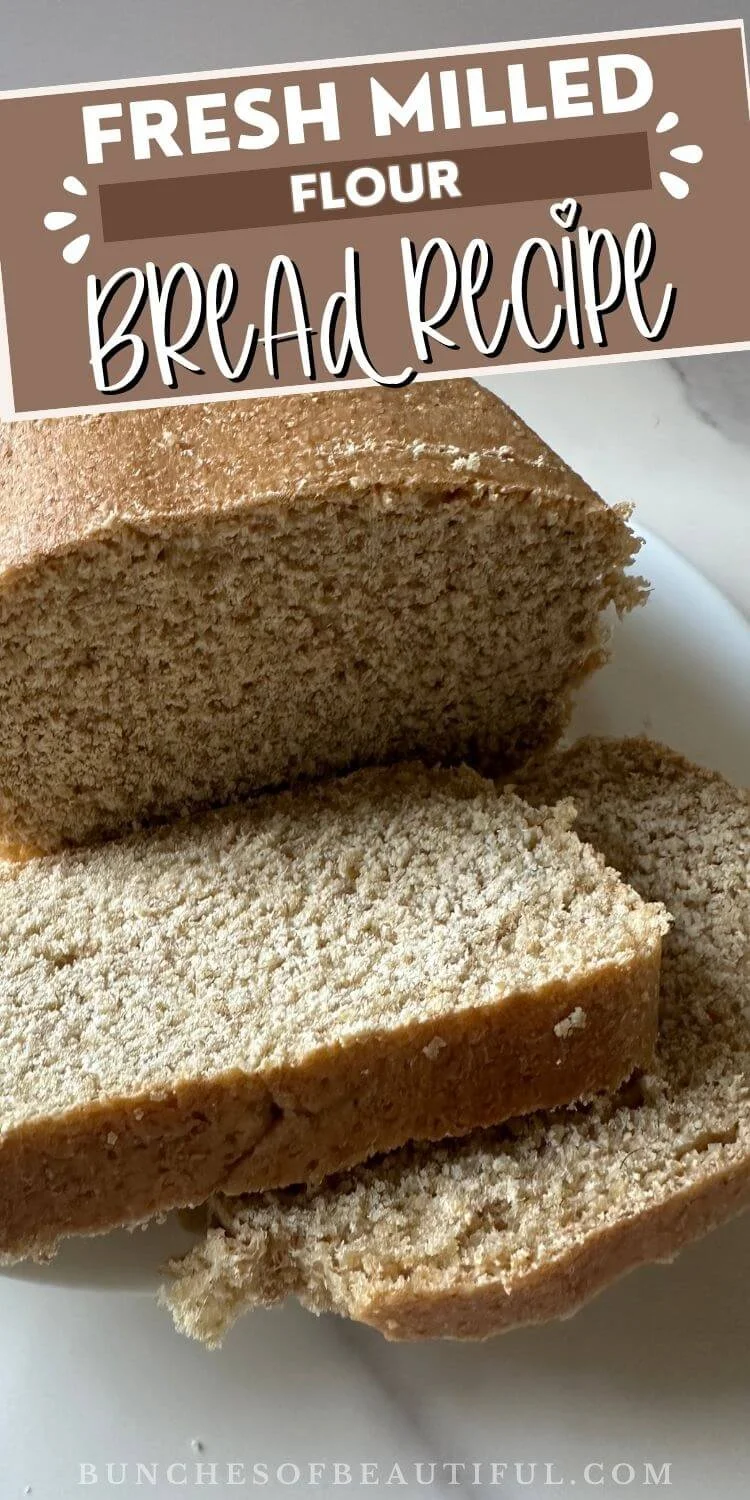
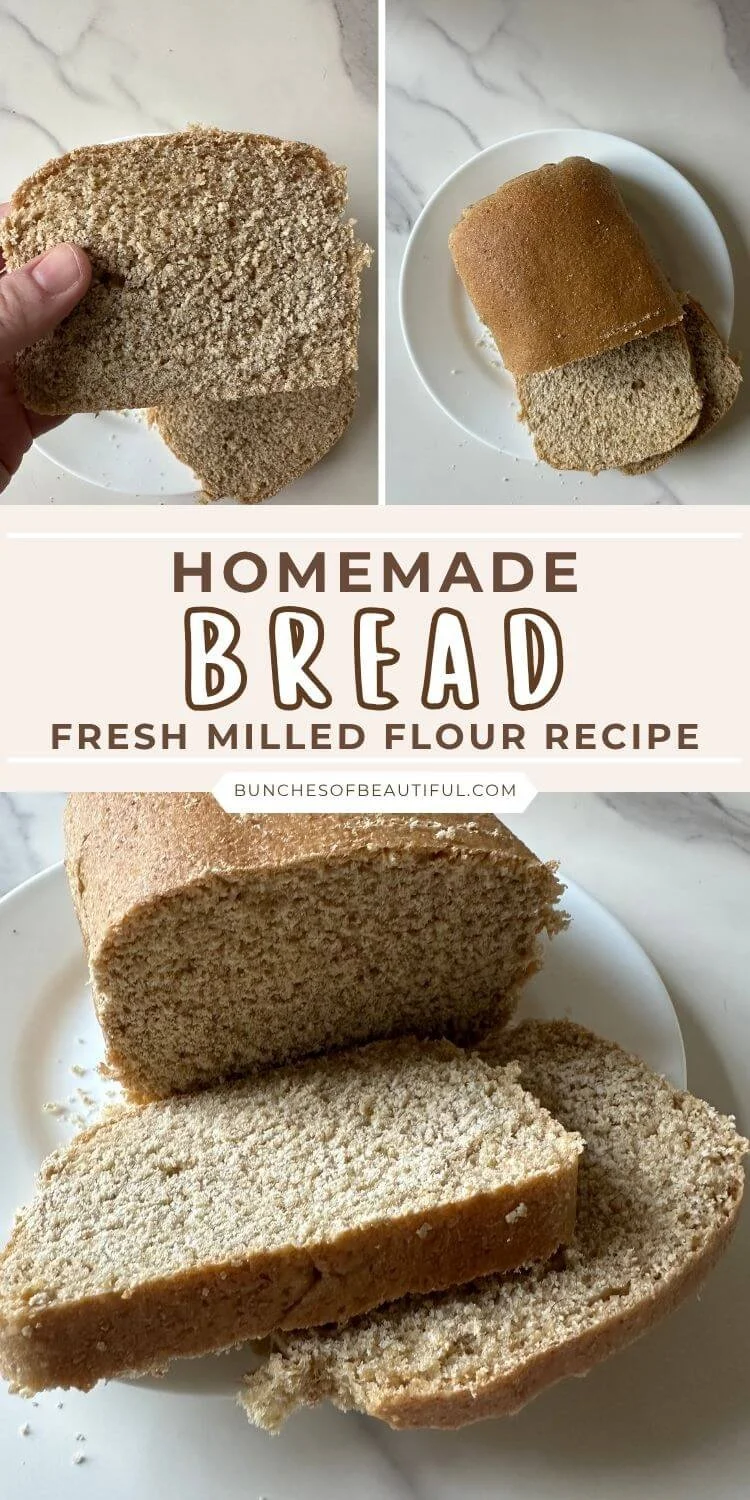
The loaf came out lightly sweet, nutty, and hearty without being heavy.
It was sturdy enough for breakfast sandwiches, toast, and burgers.
It felt like exactly the kind of first fresh milled sandwich bread loaf I needed. Simple, forgiving, useful, and encouraging enough to make me want to keep going.
May it be that for you as well.
♡ PIN IT FOR LATER ♡
This post may contain affiliate links, which means I’ll receive a commission if you purchase through my links, at no extra cost to you. Please read our full disclosure here.
Why This Loaf Bread Recipe Is Great For Beginners
This recipe works because it keeps the first fresh milled bread attempt small and doable.
One loaf gives you enough dough to learn from without making the whole thing feel like a project that has taken over your kitchen. I love a big baking day as much as the next person, but for my first fresh milled sandwich bread, I did not need a counter full of loaf pans staring back at me.
The other thing that helps is the rest time after adding part of the flour. Fresh milled flour needs a little time to absorb liquid. It does not always act exactly like store bought flour, and if you rush it, the dough can feel confusing faster than you can say, “Should this be stickier?”
Letting the flour rest in the liquid gives it time to soften and hydrate. That makes the dough easier to knead and helps you get a better texture in the finished loaf.
This bread is simple, but it is not boring. It has honey for a little sweetness, avocado oil for tenderness, and fresh milled hard white wheat for that nutty, hearty flavor.
The full measurements and instructions are in the recipe card below.

Fresh Milled Sandwich Bread
Ingredients
- 500 grams hard white wheat berries, freshly milled
- 1 1/4 cups warm water
- 1/4 cup honey
- 2 1/4 teaspoons active dry yeast (1 packet)
- 1/4 cup avocado oil
- 1 1/2 teaspoons salt
- Optional: 1 to 3 tablespoons extra water, only if the dough feels dry
Instructions
- Mill 500 grams of hard white wheat berries on the finest setting your grain mill allows. I used the KitchenAid grain mill on the finest setting.
- Add warm water, honey, and active dry yeast to a bowl. Let sit for 5 to 10 minutes, until foamy.
- Add the yeast mixture to the bowl of your mixer. Add avocado oil.
- Add about half of the freshly milled flour to the mixing bowl. Mix until combined.
- Let the mixture rest for 20 to 30 minutes. This gives the fresh milled flour time to absorb the liquid.
- Add the remaining flour and salt.
- Knead with a dough hook on low speed until the dough becomes smoother, stretchy, and slightly tacky. This may take about 8 to 10 minutes, but go by the dough more than the clock.
- If your mixer is struggling or getting hot, stop and let it rest. You can also finish kneading by hand.
- If the dough feels dry or keeps tearing, add 1 tablespoon of water at a time and gently knead it in before adding more.
- Place the dough in a lightly oiled bowl. Cover and let rise until puffed and noticeably larger, about 1 to 2 hours.
- Gently shape the dough into a loaf and place it in a greased 9x5 loaf pan.
- Cover and let rise again until the dough is about 1 inch above the loaf pan.
- Bake at 350°F for 35 to 40 minutes.
- Brush the top with butter or avocado oil after baking if you want a softer crust.
- Let cool before slicing if you want the cleanest slices.
Ingredient Notes
Fresh milled bread can feel confusing at first because the ingredients are simple, but each one has a job. Here is why I used what I used.
Hard white wheat berries
I used hard white wheat berries because I wanted a loaf that still tasted like whole wheat bread, but not in an overpowering way.
Hard white wheat has a milder flavor than hard red wheat, which makes it a good choice for homemade sandwich bread. It gives the loaf a nutty, hearty flavor while still working well for toast, burgers, and breakfast sandwiches.
Freshly milled flour
I milled the wheat berries on the finest setting my grain mill allows.
A finer flour helps the dough come together better and gives the finished bread a softer texture. Since this was my first fresh milled sandwich loaf, I wanted to give myself the best chance at bread that sliced well and did not feel too coarse.
Active dry yeast
I used active dry yeast because that is what I had on hand.
A lot of the recipes I found called for instant yeast or quick yeast, but I wanted to make a loaf without buying something extra. Proofing the active dry yeast in warm water and honey first also helped me see that the yeast was working before I added it to the dough.
Honey
The honey helps in two ways.
It gives the yeast something to feed on, and it adds a light sweetness to the bread. The finished loaf does not taste sugary, but the honey helps balance the stronger flavor of whole wheat.
Avocado oil
I used avocado oil because it has a neutral flavor and helps soften the bread.
Fat makes sandwich bread more tender, which is helpful when working with fresh milled flour. I wanted the bread to feel hearty, but not dry or heavy.
Salt
Salt is not just there for flavor, although it definitely helps.
It balances the honey and wheat flavor, and it also helps with the structure of the dough. Without enough salt, bread can taste flat even if everything else goes right.
Optional extra water
The extra water is optional because fresh milled flour does not behave exactly the same every time.
Your wheat, your grind, and even the humidity in your kitchen can change how much water the dough needs. If the dough feels dry or keeps tearing, add 1 tablespoon of water at a time and knead it in before adding more.
I needed a little extra water when I made mine, and it made the dough much easier to work with.
♡ PIN IT FOR LATER ♡
What The Dough Should Feel Like
This was the biggest thing I had to learn while making this loaf.
Fresh milled bread dough can feel different from dough made with store bought flour. It may feel a little tackier, heavier, and slower to smooth out at first. That is normal.
For this loaf, the dough should feel:
Smoother than when you started
Stretchy when you pull on it
Slightly tacky, but not wet
Soft and workable, not dry or stiff
I would not stress over getting a perfect windowpane with this recipe. I never got one, and the bread still turned out well.
Instead, pay attention to how the dough feels. If it keeps tearing, looks dry, or feels stiff, it probably needs a little more water. Add 1 tablespoon at a time and knead it in before adding more.
The goal is not a wet dough. The goal is a dough that feels soft, elastic, and workable.
Around 8 to 10 minutes of kneading is a good starting point, but the dough matters more than the timer. Once it feels smoother, stretchy, and slightly tacky, I would stop kneading and move on to the first rise.
How to Store Homemade Sandwich Bread
Homemade bread does not have preservatives, so it can go bad faster than store bought bread. I would recommend using the refrigerator or freezer option unless you know you will eat the loaf quickly.
Room temperature: Best for 1 to 2 days
Store in an airtight bag or container if you plan to eat it fast. This keeps the texture softer, but it will not last as long.
Refrigerator: Best for several days
This is what I did. Once the loaf cooled, I put it in a zip top bag and stored it in the refrigerator. I made it on Sunday, and it lasted until Friday.
Freezer: Best for longer storage
Slice the loaf first, then place the slices in a freezer safe bag. Add parchment paper between slices if you want to pull out one at a time.
Toast from frozen or thaw on the counter.
Tips for Using a KitchenAid Mixer For Fresh Milled Bread
A lot of fresh milled bread bakers use a Bosch mixer because it can handle larger batches of dough really well!
I had read that KitchenAid mixers can struggle a little with fresh milled bread dough, and honestly, that was one of the biggest reasons I wanted this recipe to make only one loaf. I did not want my old mixer to croak in the name of sandwich bread.
Since this recipe only makes one loaf, I was able to make my KitchenAid work for me. If you are also using a KitchenAid, here are a few tips.
Watch your mixer speed
I found that my mixer struggled when the speed was too low, but the highest speed was way too fast. For my mixer, speed 4 or 5 seemed to be the sweet spot.
That said, use your best judgment and follow the guidance for your specific mixer. If it sounds strained, starts getting hot, or seems like it is working too hard, stop and let it rest or knead by hand.
Stick around while the dough is kneading
Because the KitchenAid motor is on top, the dough can climb right up the dough hook and stick to the side of the bowl. When that happens, it is not really getting kneaded.
I had to stop the mixer a few times, push the dough back down, and then keep going. Slightly annoying, but very normal.
Finish by hand if needed
This recipe only needs about 10 minutes of kneading in the mixer.
My personal mixer started having trouble and getting warm closer to the 13 minute mark, so I would definitely pay attention while it kneads. If your mixer is getting hot or struggling, stop and finish kneading by hand.
This is also a good way to check the dough texture. You are looking for dough that feels smoother, stretchy, and slightly tacky.
Make one loaf at a time
For this recipe, one loaf felt doable. The mixer still needed a little help and a watchful eye, but it handled the dough okay.
I think trying to knead more than one loaf of fresh milled bread dough would be really hard on my KitchenAid, so for now, I’ll stick to one loaf at a time. I would err on the side of caution until you see how your KitchenAid handles the dough, then reassess from there.
♡ PIN IT FOR LATER ♡
-
I have not tested this recipe with instant yeast yet, but it should work!
I would try about 1 and 3/4 teaspoons instant yeast in place of the 2 and 1/4 teaspoons active dry yeast.
With instant yeast, you do not need to proof it in the water first. You can mix it in with the flour, then add the water, honey, and oil with the wet ingredients.
Keep an eye on the dough instead of only watching the clock because instant yeast may rise faster.
-
I did not get anywhere close to windowpane, and the loaf still turned out well!
Look for dough that feels smoother, stretchy, and slightly tacky. If it feels dry or keeps tearing easily, knead in about a tablespoon of water at a time and let the dough rest 5 minuets.
-
Yes, but the flavor will be stronger.
Hard red wheat has a deeper wheat flavor. Hard white wheat is more mild, which is why I like it for a sandwich bread recipe.
-
The rest gives the fresh milled flour time to absorb liquid.
This helps the dough soften and makes it easier to knead. It also gives you a better chance at a soft, sliceable loaf.
-
Add 1 tablespoon of water at a time and gently knead it in before adding more.
Fresh milled flour can vary depending on your wheat, your mill, and the humidity in your kitchen. A little extra water can make a big difference.
-
Yes. Since this recipe only makes one loaf, you can knead it by hand.
It may take a little longer, but the dough cues are the same. Look for dough that becomes smoother, stretchy, and slightly tacky.
-
Yes. I would slice it first, then freeze the slices in a freezer safe bag.
That makes it easy to grab one or two slices for toast, breakfast sandwiches, or a quick snack.
-
Yes. This bread is sturdy enough for sandwiches, breakfast sandwiches, burgers, and toast.
It is not as light as store bought white bread, but it is soft enough to use as everyday homemade sandwich bread.
-
I would not use all soft white wheat for this recipe.
Soft white wheat is lower in protein, so it is better for things like muffins, pancakes, biscuits, cookies, and quick breads. For yeast bread, I would stick with hard white wheat because it has more protein and gives the loaf better structure.
This loaf reminded me that trying something new in the kitchen does not have to look smooth the whole time. My process was messy, humbling, and very much not perfect, but I still ended up with bread we were happy to eat all week.
That is the kind of recipe I want to keep around. Simple enough to try again, forgiving enough to learn from, and useful enough to become part of normal life.
If you are ready to make your first loaf of fresh milled bread, I hope this fresh milled flour recipe gives you the same little kitchen win it gave me. hugs.

For more on the Fresh Milled Flour Recipes follow me on Pinterest!
Updated on: 5/14/2026